Automatically create personalized emails for records according to an email template
Automatically create personalized emails for records in your table using =Stringtemplate
Click here for a video tutorial
In this example, we are a hiring manager notifying applicants about their background check results. I want my emails to show the applicantName and applicant Background check result
Step 1: Connect to your data (e.g., Google Sheet):

Step 2: Write your email template in a cell (make sure it's not near your table which could grow). A best practice is to write the template in a separate sheet (e.g., Sheet1 which comes with your Lido file). In this example, we want to notify applicants about their background check results:
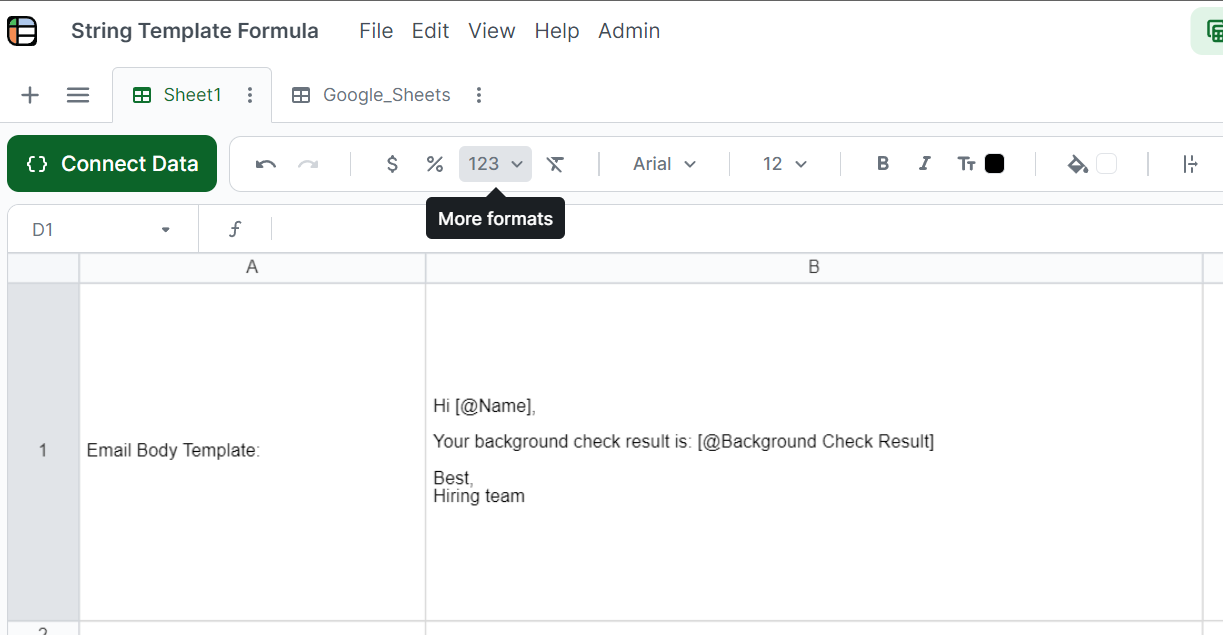
NOTICE: In my email template, I reference the Name column and Background Check Result column by including[@Name] and [@Background Check Result] in my email template.
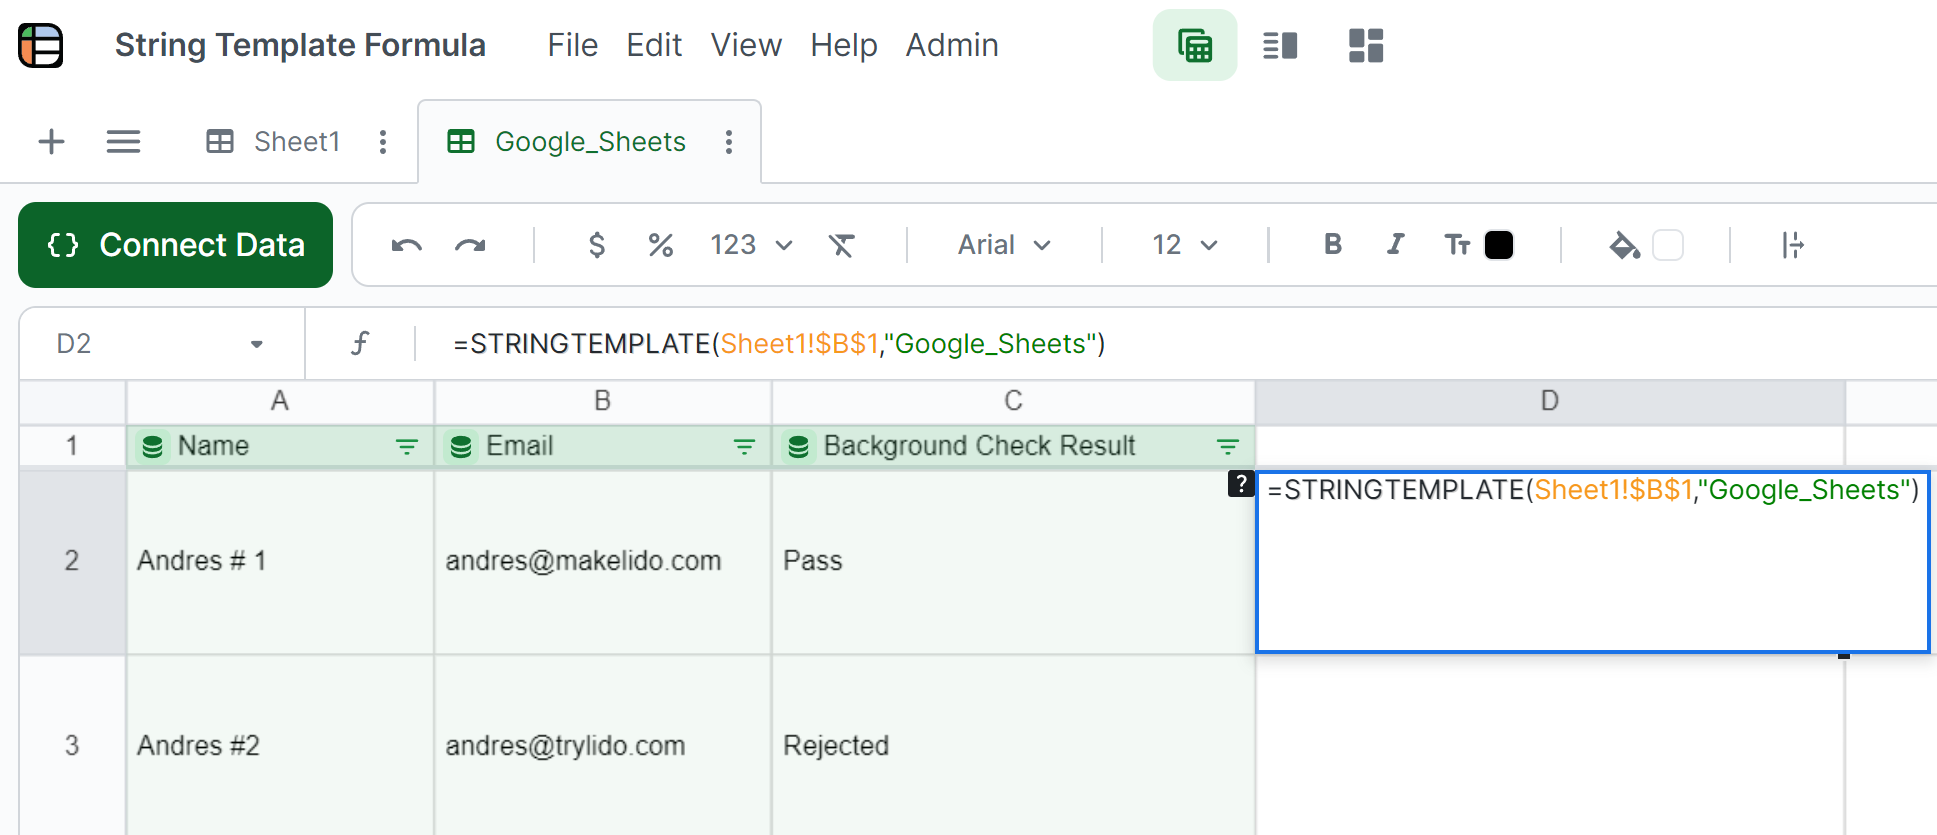
Step 3: Go to your sheet holding holding your Google Sheets data table. We will be using the =STRINGTEMPLATE(template, table_name) formula. For this example, we will write =STRINGTEMPLATE(Sheet1!$B$1,"Google_Sheets"):
- Note 1: To reference the cell holding your email template, while inside the formula, click on Sheet1 and then click on the template cell.
- Note 2: It is important to anchor the template cell with dollar signs ($B$1) and to input yourtable name in quotes ("GoogleSheets").
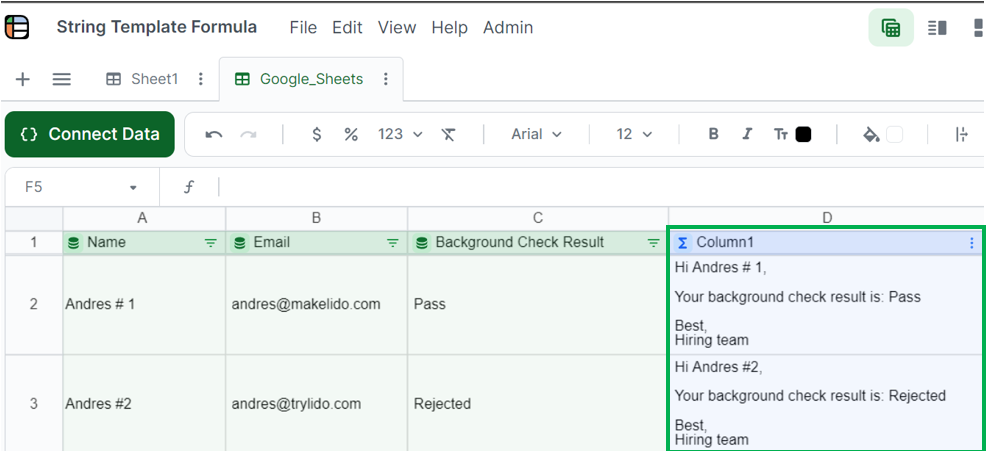
Step 4: Once you press enter you will create a blue computed column holding the personalized email bodies for each applicant. Notice how the email bodies for each applicant include the unique Name and Background Check Result of the applicant:
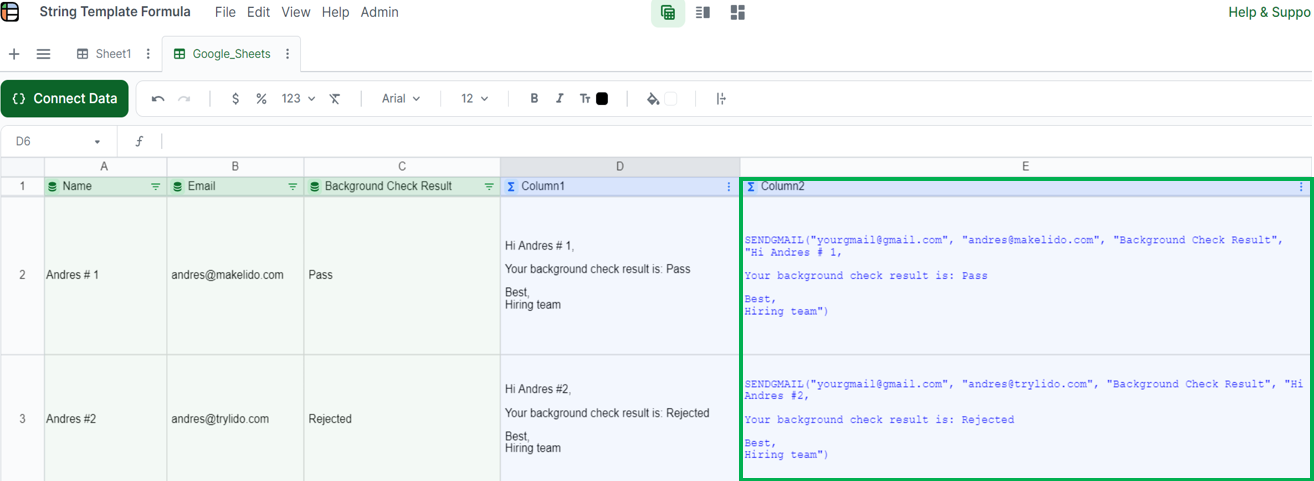
Step 5: Set up your =SEDNGMAIL() trigger in the next blank column to the right as so:
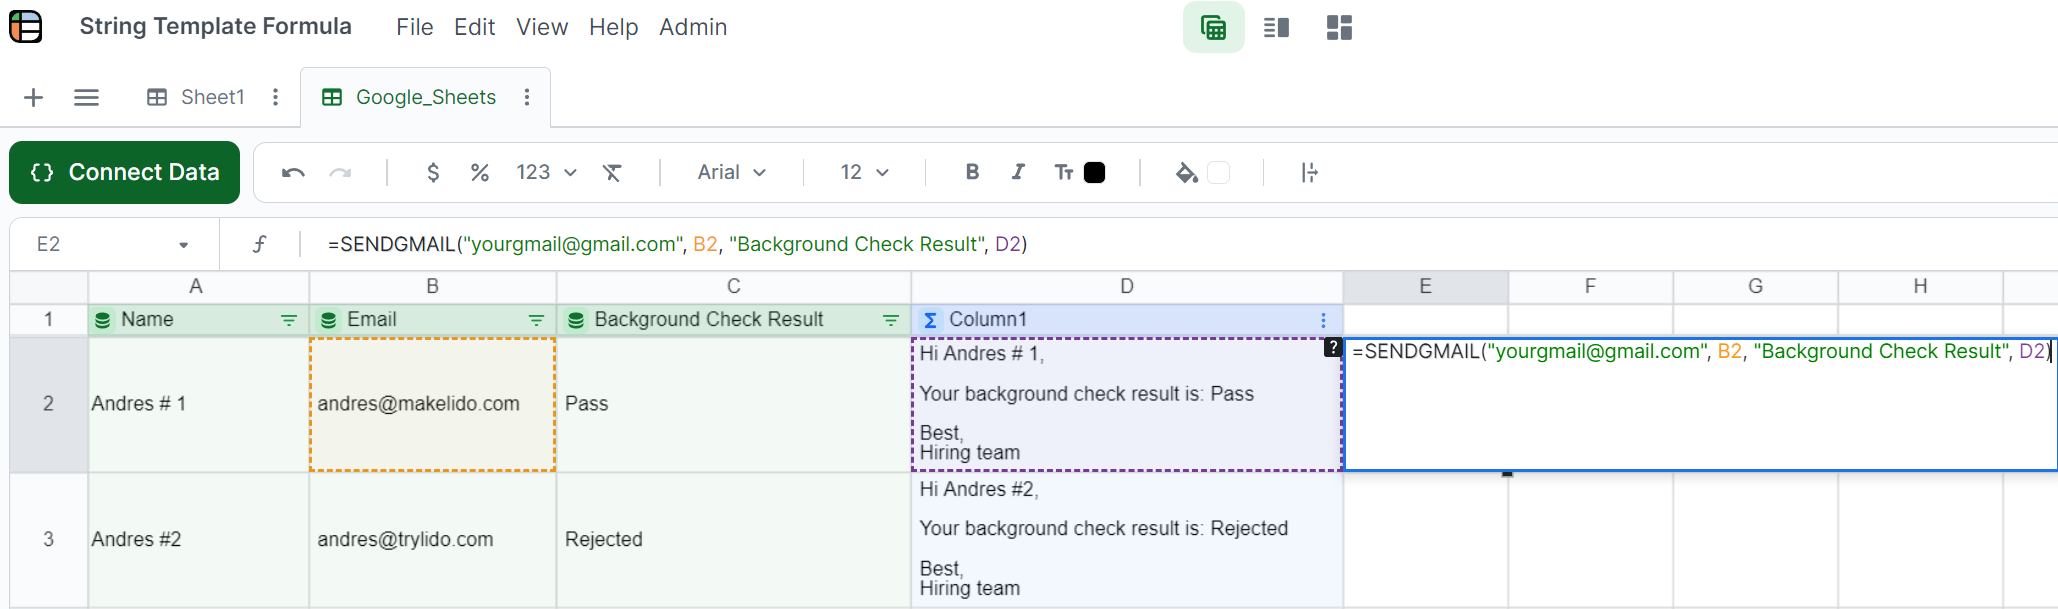
- Note: my =SENDGMAIL(sender, recipient, subject, body) inputs are:
- Sender: your gmail / google account email in quotes (e.g., "[email protected]")
- Recipient: the applicant's email who will be notified of their Background Check Result. In this case, the recipient emails are held in column B, so I just reference the recipient email cell (e.g., B2)
- Subject: the subject of the email in quotes (e.g., "Background Check Result"). In this case, the subject will be the same for every applicant.
- Body: the email body which is held in column D. So I reference the D2 cell.
Step 6: When you press enter, a blue computed column will be created holding the correct =SENDGMAIL() formulas for each record. That is the magic of computed columns!:
Step 7: Now you can test send your emails and see how they look! You can send a single email by right clicking on any of the =SENDGMAIL cells and pressing 'Run action'. Then you can look in the sent items of your email account to see what the email looks like.
- If you want to send all emails at once, automate emails, track email statuses (and make sure emails are only sent once) click here
Updated about 2 months ago