Automatically send emails to new Google Sheet entries
Step by Step Guide
This step-by-step guide will show you how to automatically send emails based on new entries to a Google spreadsheet using Lido.
Overview video - How to automatically send emails to new entries in a Google Spreadsheet
Step 1: Connect to your Google Sheet
Start with a Google Sheet of class signups. You might populate this sheet manually, as a result of a Google Form, or some other way.
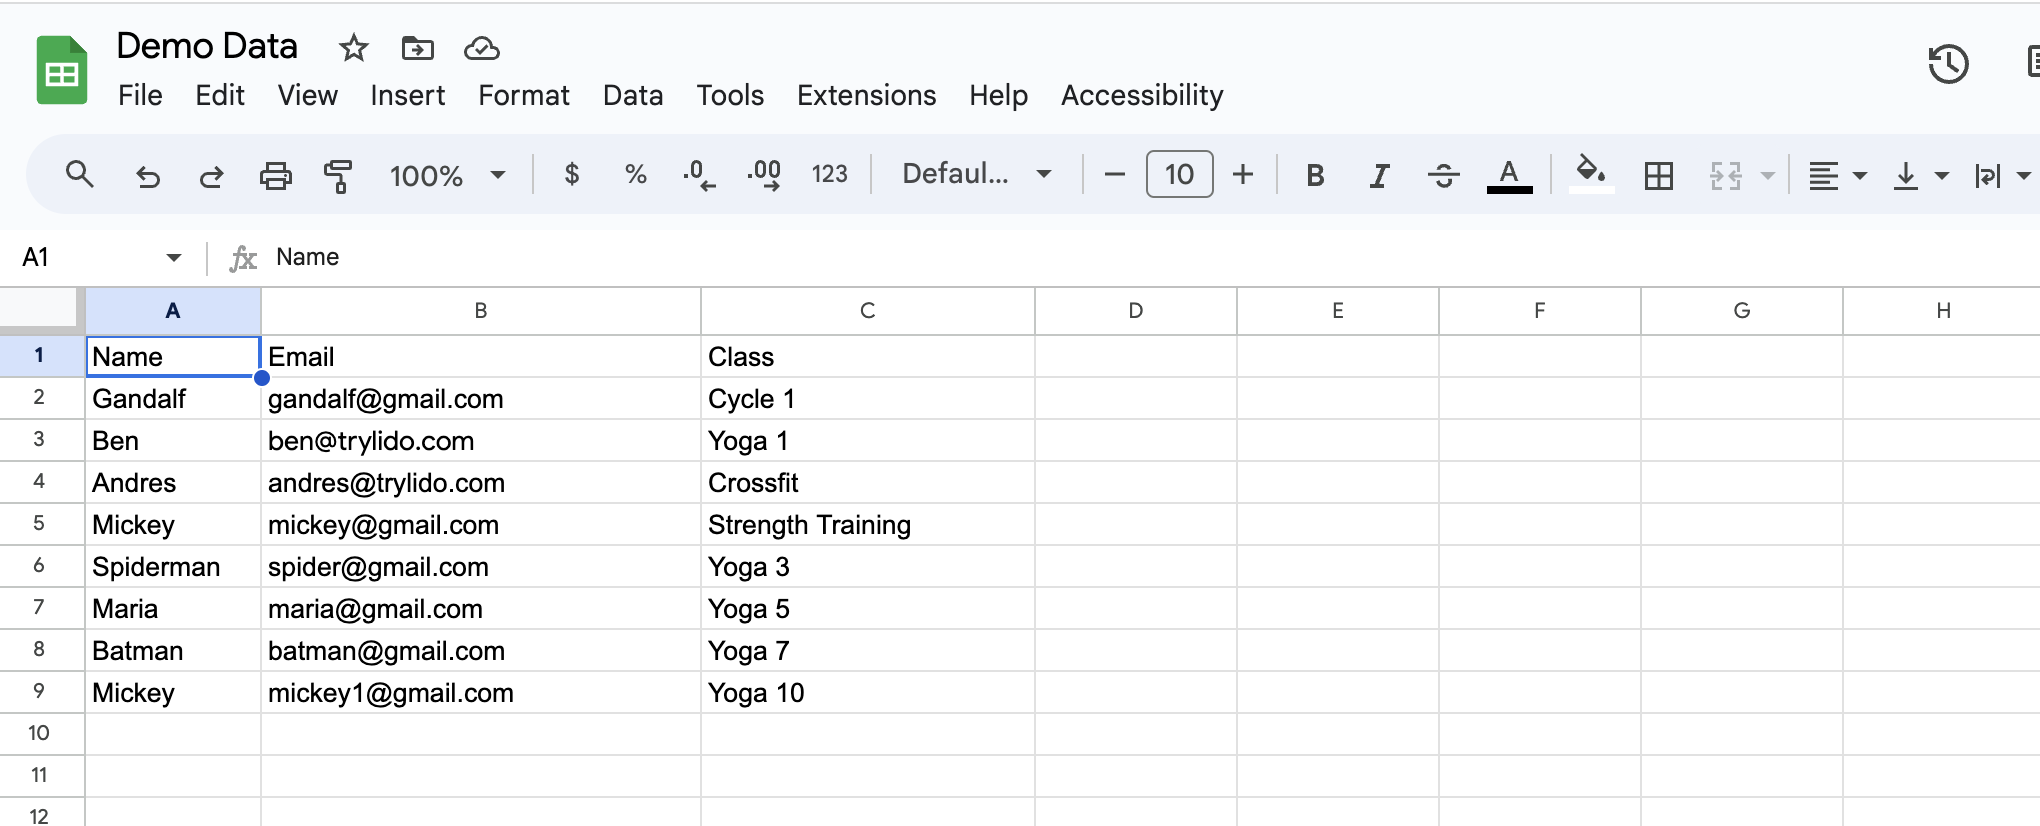
Make sure that:
- the first row contains header cells
- there are no blank rows
Step 1
Copy the sheet URL.
Step 2
In Lido, click on "Connect Data" > Add Connection > and paste in the sheet URL
Step 3
Choose the columns you want to bring in and click on "Add Data"
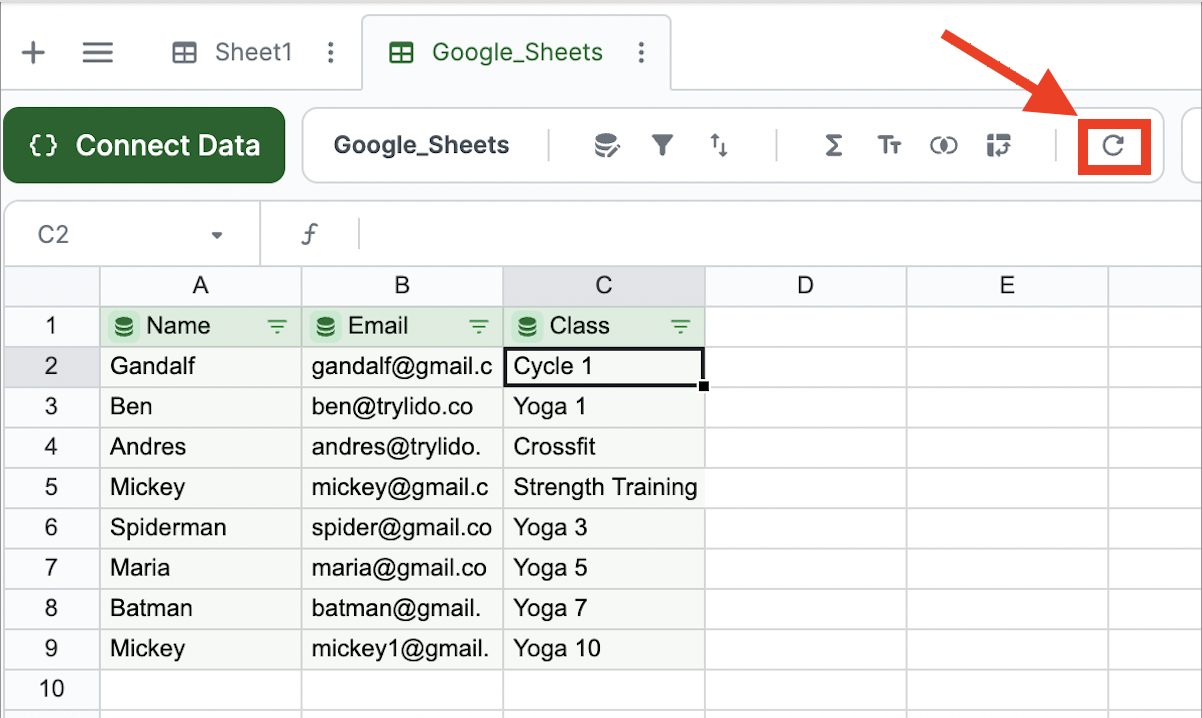
Your Google Sheet data will live stream into Lido.
- If you want to manually refresh the Google Sheet data click on the refresh data button.
- when you set up automations, data is automatically refreshed before each automation is run.
2. Create Email Subject and Body Message Templates in a new Worksheet
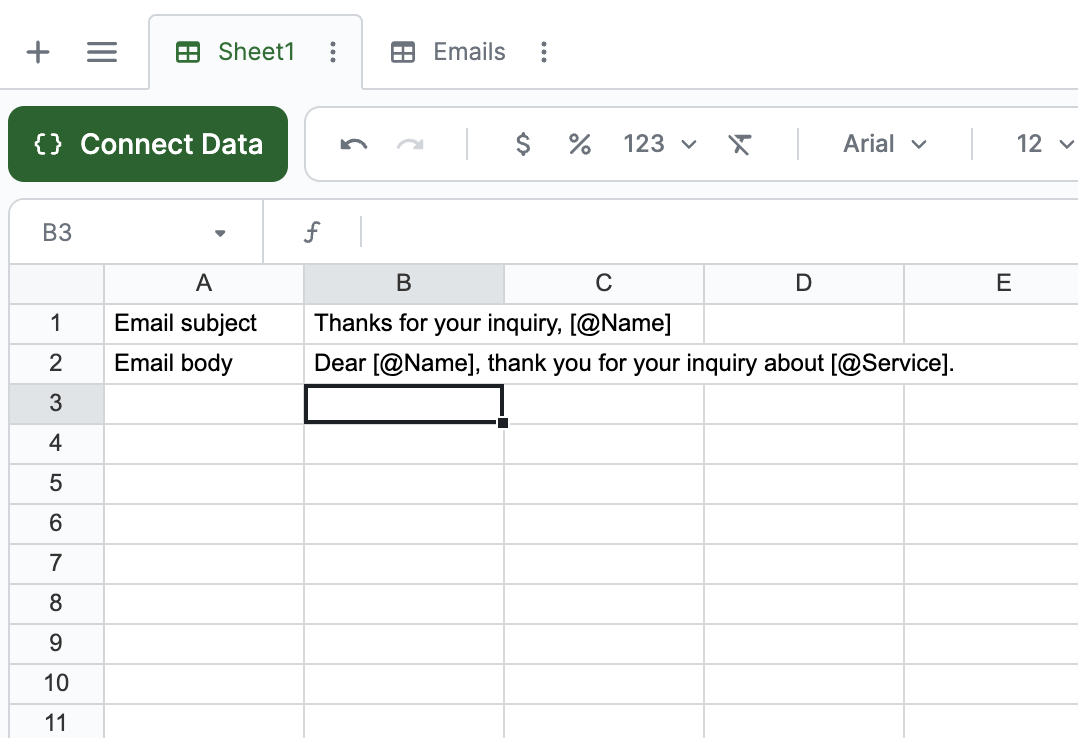
In a new worksheet, type in your email subject and body content. Reference your columns as variables using this format: [@Column].
In the example below we entered the text below in Column B:
Email subject:
Thanks for your inquiry, [@Name]
Email body:
Dear [@Name], thank you for your inquiry about [@Service].
3. Create a Email Subject and Body Columns Referencing the Message Template
Lido has a formula called =STRINGTEMPLATE() that replaces column references (like [@Name]) with the values of a row in a table. We will use this to create dynamic email subjects and bodies.
Make a computed column by entering this formula in a cell directly next to your table:
=STRINGTEMPLATE("email_body_cell")
Where:
email_body_cell is the cell location of the email body we made in step 5. Remember to absolute reference this, like Sheet1!$B$1.
A computed column is a special type of column in Lido that automatically applies the same formula to every row in your table.
Our formula in column D2 for email subject will be:
=STRINGTEMPLATE(Sheet1!$B$1)
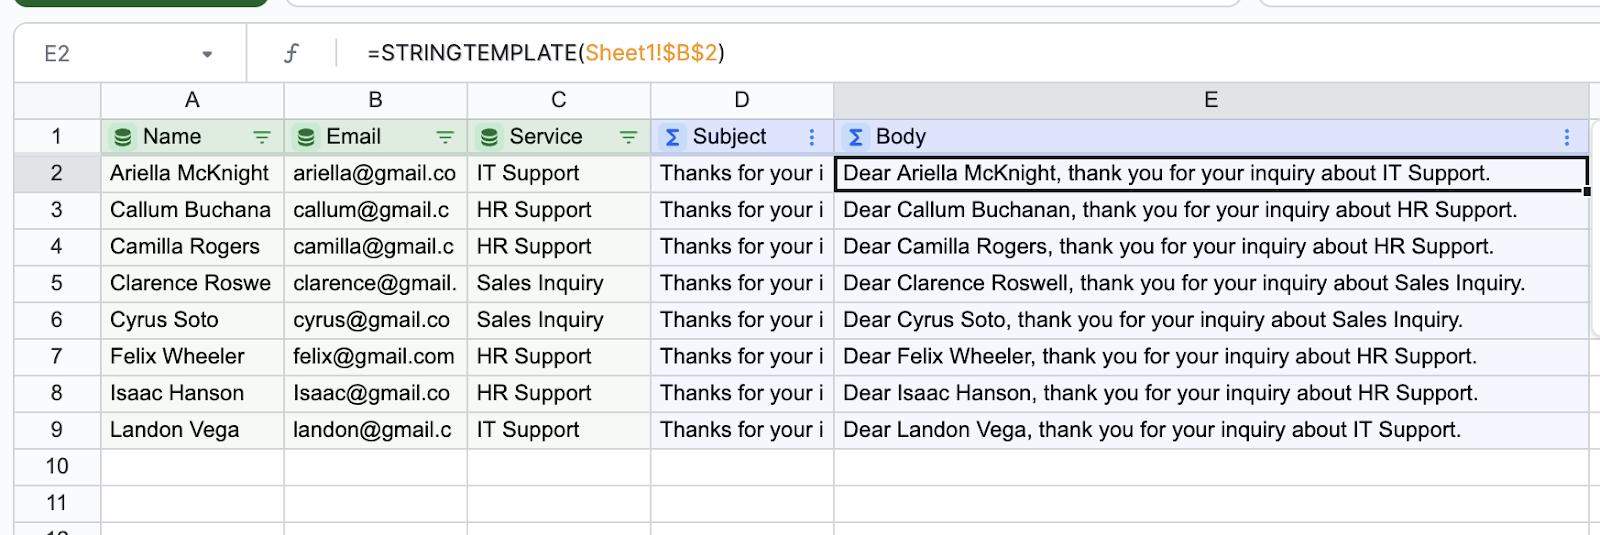
And then for column E2 for email body it is:
=STRINGTEMPLATE(Sheet1!$B$2)
Your table should now have subject and body columns with dynamic content, like this:
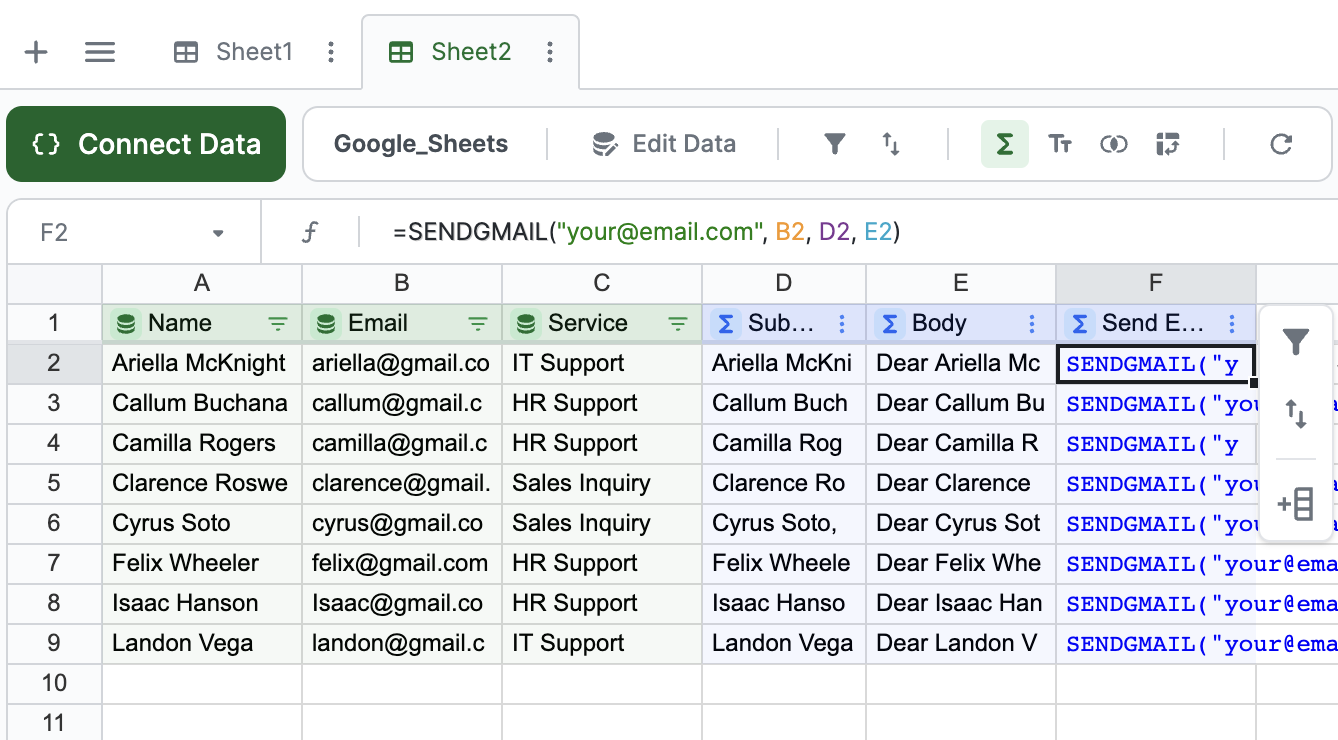
4. Configure the =SENDGMAIL() Formula
The formula to send an email from Lido is:
=SENDGMAIL(sender, recipient, subject, body)In our example this will be:
sender: the email address you want to send emails from. This must be a Gmail or Gsuite account.
recipient: email address in B2
subject: D2
body: E2
SENDGMAIL("[email protected]",B2, D2, E2)
Enter this formula in a cell directly next to your body column and click enter to create another Computed Column.
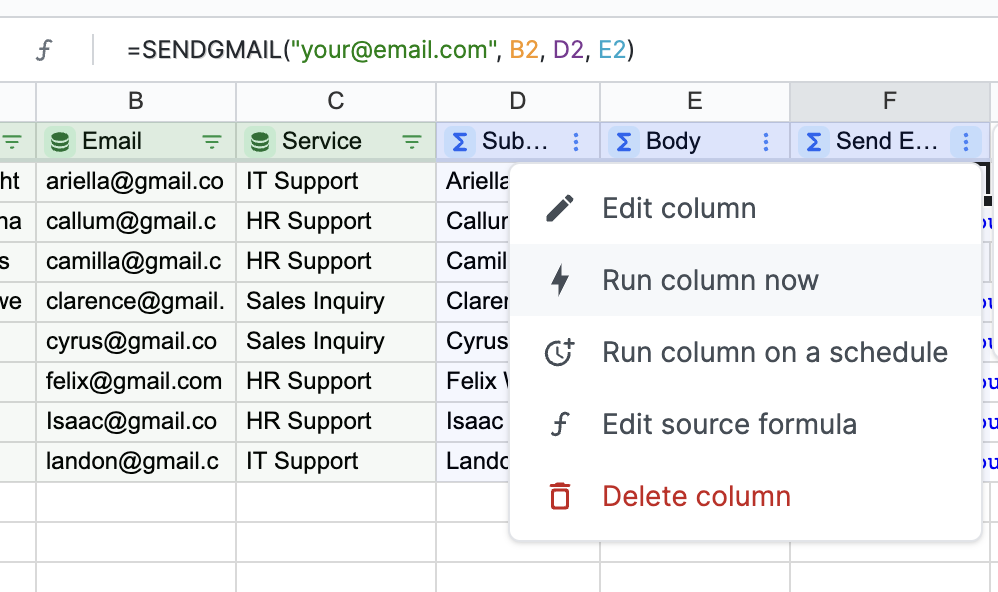
5. Send a Test Email
Let’s test one of these actions to run. Right click on a SENDGMAIL formula and click Run action. You’ll need to authenticate into your Gmail account the first time.
6. Click Run to Send all Emails in the List
Click on the 3 dot menu in your SENDGMAIL column, then select Run column now to automatically send all of your emails at once.
When you enter a formula in any row in a Computed Column, that formula is automatically updated for all rows and new ones
7. Automate Sending Emails on a Recurring Schedule
If you don’t want to manually run your email actions every time, you can set up a Lido automation to do it for you.
In the 3 dot menu for your SENDGMAIL column, select Run column on a schedule.
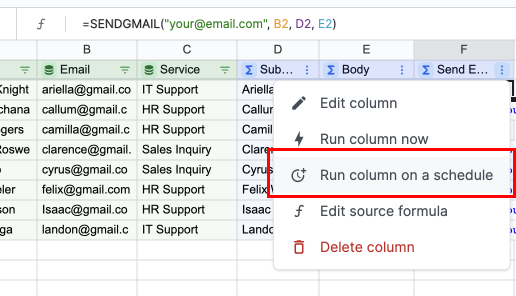
This will open the automation panel. Select an option for how frequently you want to run every SENDGMAIL Action in the column. Before every automation run, Lido will automatically fetch the latest data from Google Sheets as well.
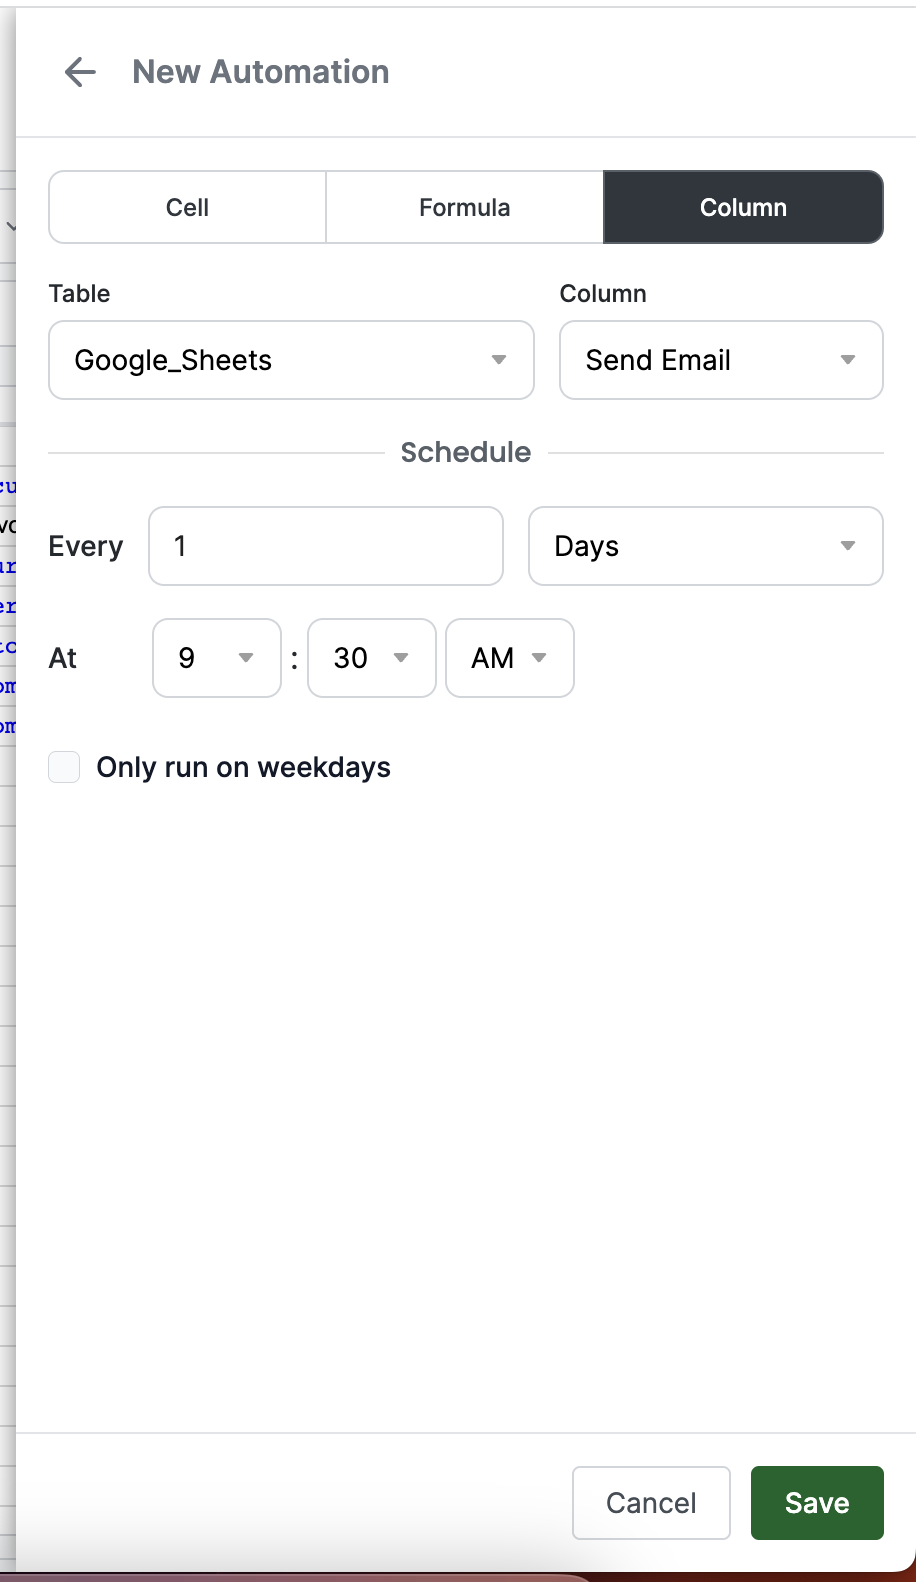
In this example, we are going to automatically send out our emails once per day at 9:30am.
Click save to create your new automation.
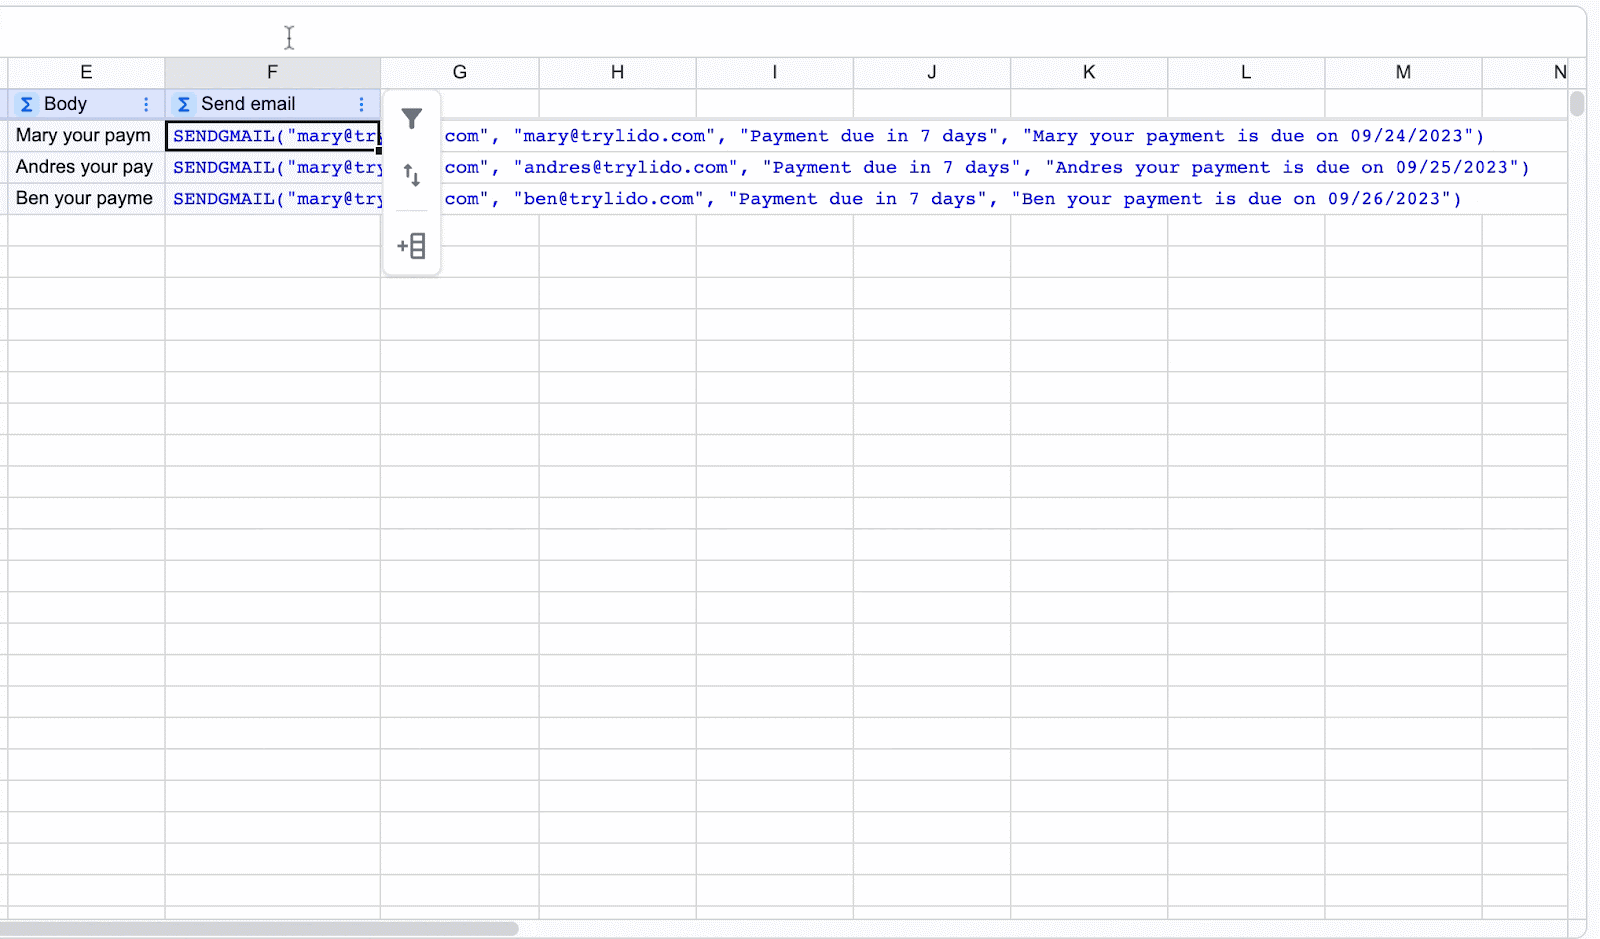
How Do I Email Each Person Only Once?
If you are planning to run this automation regularly and don't want to email the entire list each time, it is a good idea to create a status column where we can keep track of who has already been sent an email. Create a status column by typing "Status" in the top cell of the next empty column.
Next, add a 5th parameter to SENDGMAIL that will put its status in the status column. For our example:
=SENDGMAIL("[email protected]", B2, D2, E2, G2)
Copy
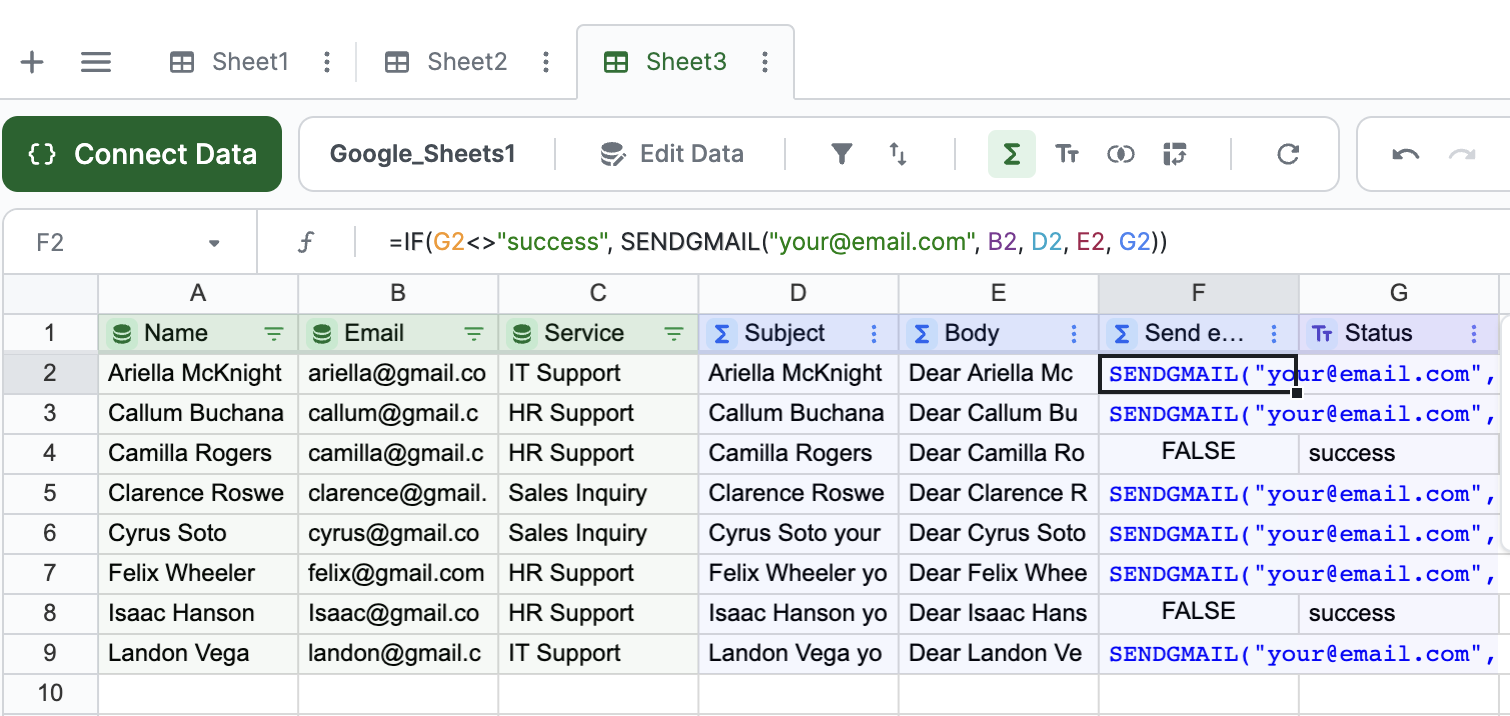
Finally, we will wrap our SENDGMAIL formula in an IF statement to check if the the email has been sent already (G2="success"), and only show SENDGMAIL if it has not been sent. Otherwise, FALSE is displayed. When the column is run now, only rows that have SENDGMAIL in them (no email has been sent yet) will trigger emails.
=IF(CELL REF <> “success”), SENDGMAIL([email protected], recipient, subject, body, CELL REF))
Where:
CELL REF <> “success” - This is the cell in your status column that is not filled with success
In our example we will use the following formula.
=IF(G2<>"success", SENDGMAIL("[email protected]", B2, D2, E2, G2))
Copy
This formula checks that the value in our status column in G2 does not equal success. It then sends and email and updates cell G2 with success so we can keep track of who received an email. The SENDGMAIL formula will display as FALSE on rows where an email has been sent.
You're done!
The next time a new record is added to your original Google sheet, within 5 minutes it will be pulled into Lido and an email will be sent.
Troubleshooting
My Google Sheets data has disappeared or isn't displaying as expected
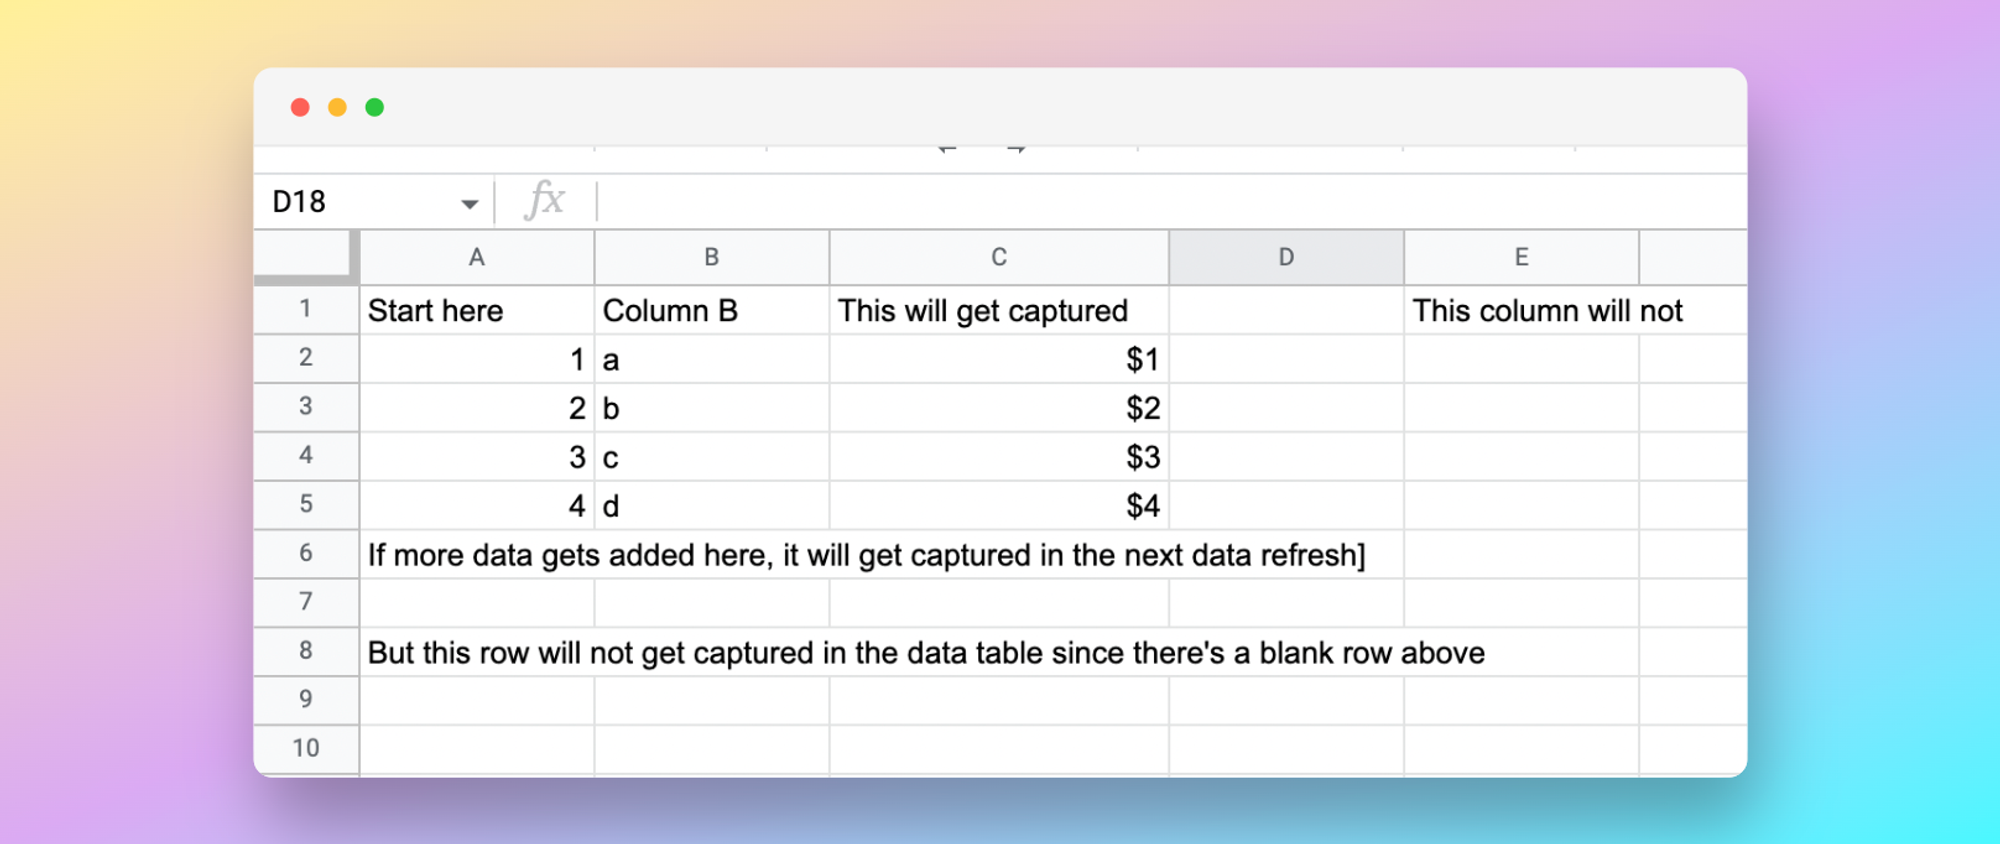
If your data isn't appearing as expected, chances are that you just need to reformat your Google Sheet to work with Lido's integration:
-
The first row of your data range should be your column headers
- Column headers cannot be blank, contain special characters or line breaks
-
Remove empty rows and columns
- Individual cells inside of the selected range can be blank, but a completely empty row or column will "stop" the range of data that's fetched
Changing column or worksheet names in your Google Sheet will break their connection with Lido
If you're missing columns or data, click edit data in your dataset then re-add the missing columns in the data browser.
Want more help?
- Schedule a support video call
- Join our Slack group
- Use the live Chat on our main website
Updated 2 months ago