ADDCALENDAREVENT formula
Lido's ADDCALENDAREVENT formula allows you to create customized Google Calendar events & invite attendees
Lido's ADDCALENDAREVENT formula lets you create Google Calendar events as part of any workflow. Invite attendees to your meetings with just a few clicks!
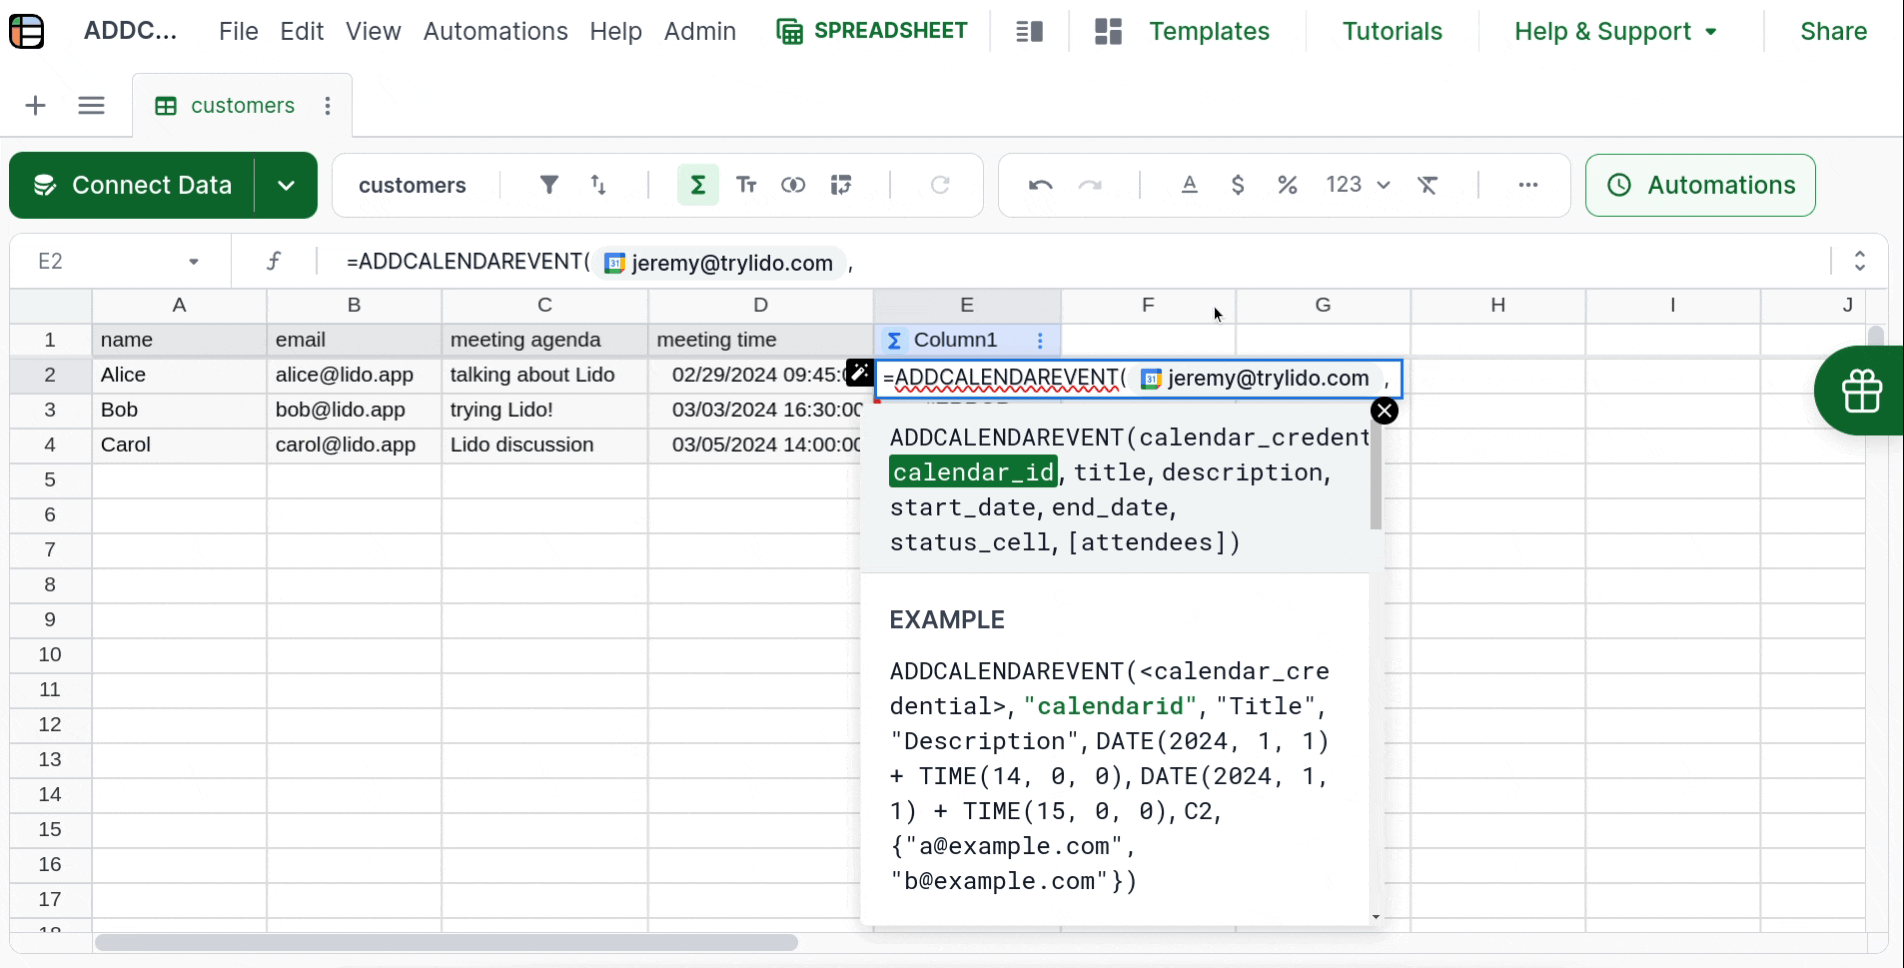
=ADDCALENDAREVENT(calendar_credential, calendar_id, title, description, start_date, end_date, status_cell, [attendees])
Setting up your ADDCALENDAREVENT formula
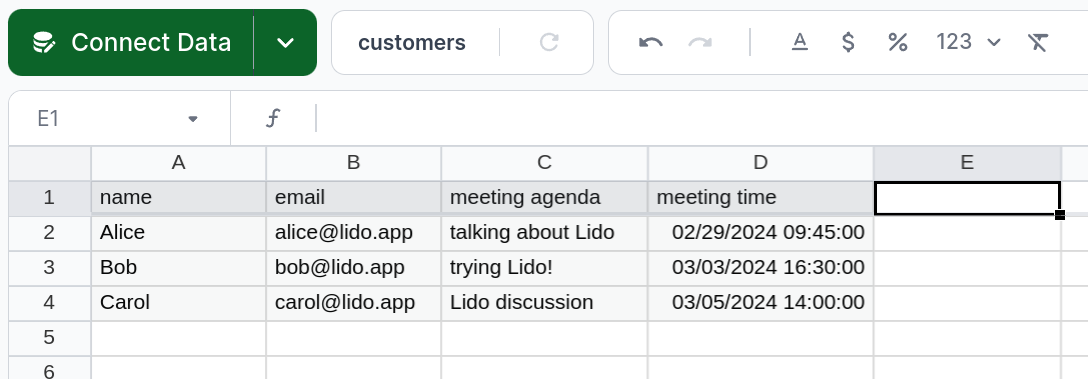
For our example, we'll use the following test customer data. Maybe you have a form on your website where customers can book calls with you, and you want to automatically create a calendar event to make sure nothing gets missed. ADDCALENDAREVENT can be easily adapted to any input data, so we'll go through a more complicated example later.
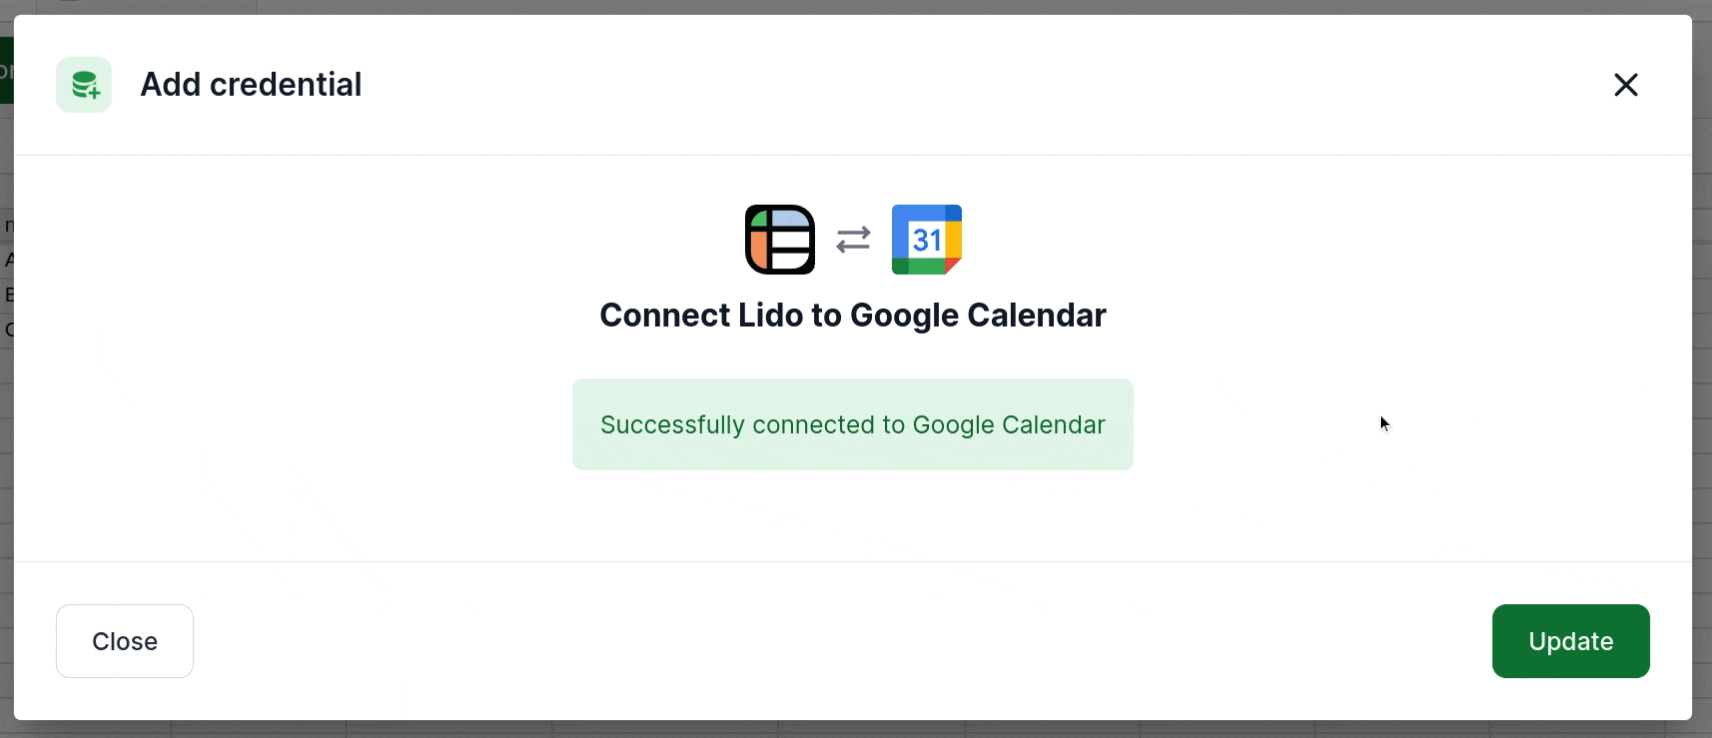
All we need to do is go next to the second cell to the right of our data table and start typing =ADDCALENDAREVENT. This will bring up a dropdown to add a Google Calendar Credential. If you have already added one, feel free to use it. Here we'll demonstrate how to add a new one. Just click the "Add Credential" button, then click the "Connect to Google Calendar" button in the new window. A new tab or window will open in your browser allowing you to authenticate with Google.
Once you've finished the Google authentication, you will be brought back to Lido, and you can click the "Update" button to automatically place your new Google Calendar credential into the ADDCALENDAREVENT formula.
The next argument we need to add this the Google Calendar ID. Go to Google Calendar and find the calendar you want to use with Lido on the left sidebar. Mouse over the name of the calendar, click the three dots that appear, then click "Settings and sharing". Then, on the navigation for the settings page on the left-hand side, click "Integrate calendar" (you may need to click the name of your calendar again to make it appear). Your browser should scroll down the page to that section. The first item you should see is the Calendar ID. Copy this text, then go back to Lido. Select one of the cells you were editing before (it may have an error, this is fine!) and hit Enter to edit it. Finally, paste the Calendar ID between double-quotes for the second argument. Your Calendar is now connected to the ADDCALENDAREVENT formula!
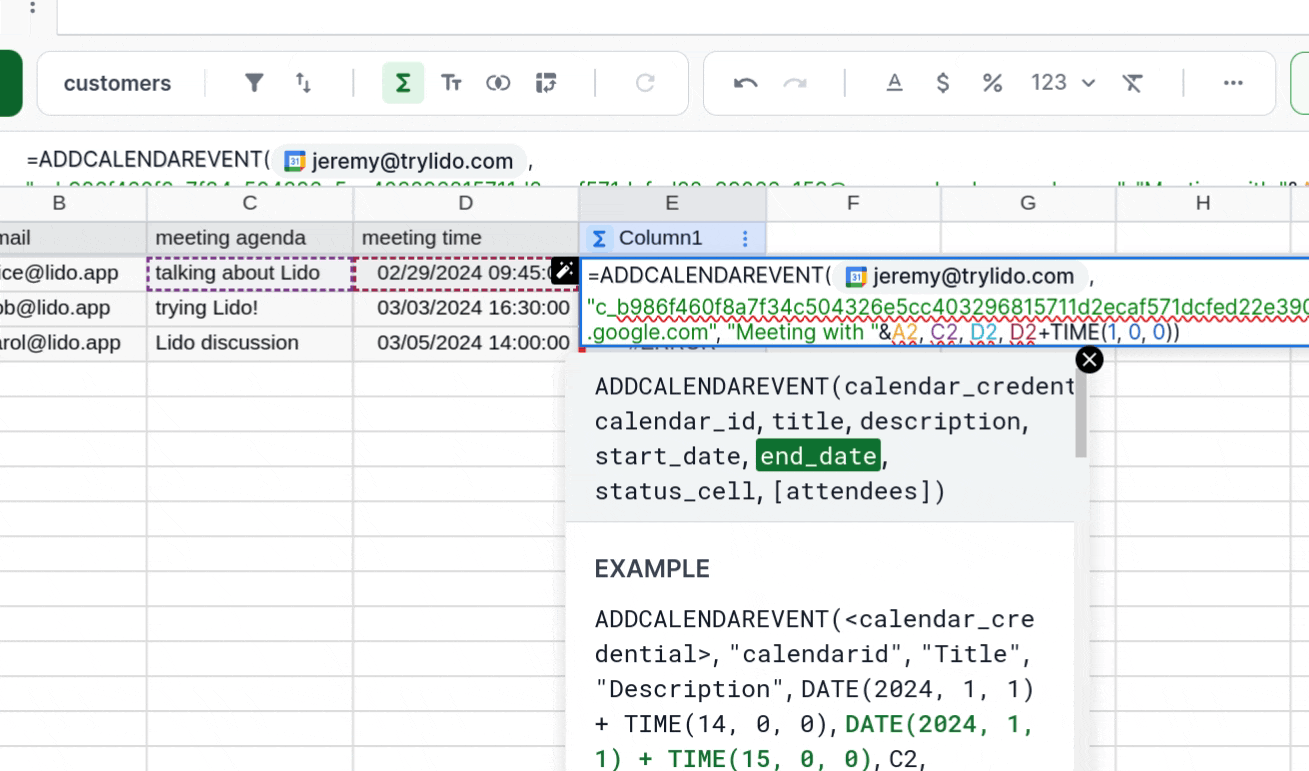
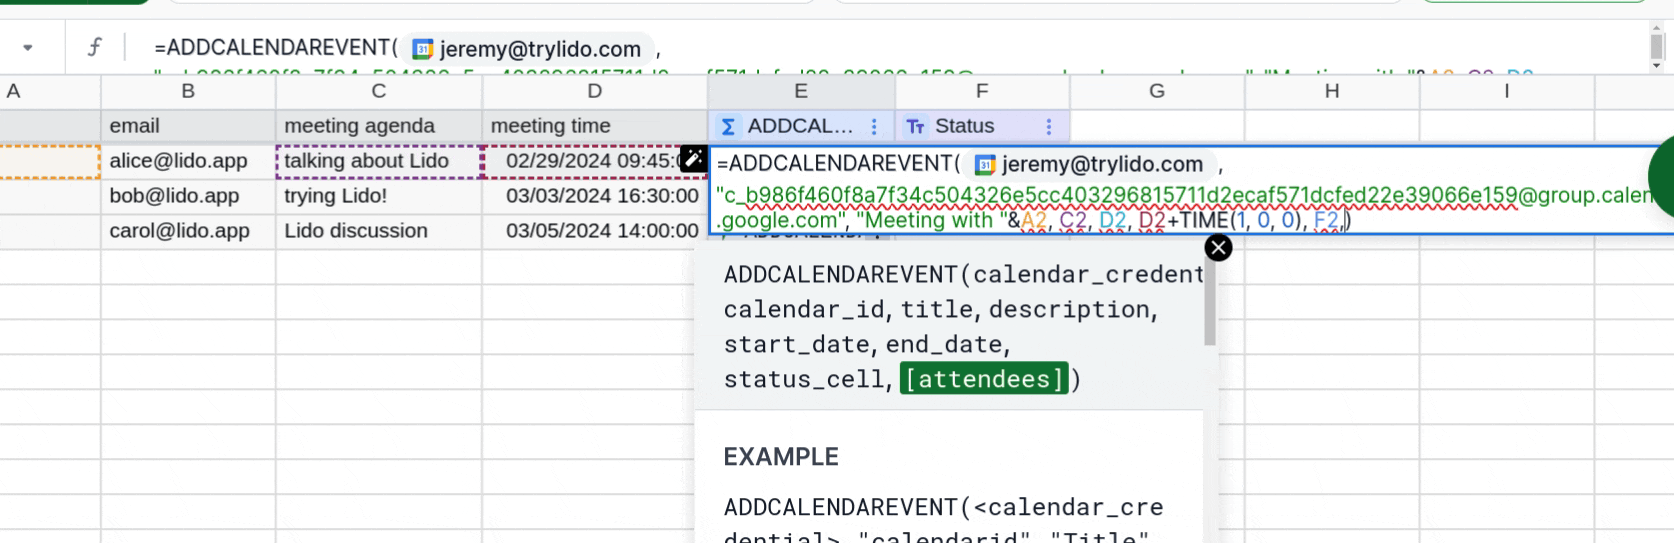
Next, we can enter the parameters for the event. The title can be anything you want; for this example, we want "Meeting with <customer's name>". We can use the concatenation operator & to assemble this title. For the third argument, we'll use "Meeting with " & A2. This will combine the "Meeting with " part with the values in the first column, which are our customer names.
For the description, we'll just use the "meeting agenda" column, so we can enter C2.
We have a "meeting time" column that we can use for the start_date argument (D2), but how do we get the ending time? We'll assume for this example that all the meetings should last an hour. Then we can just add an hour to the start_date, and use that for the end_date argument: D2 + TIME(1, 0, 0).
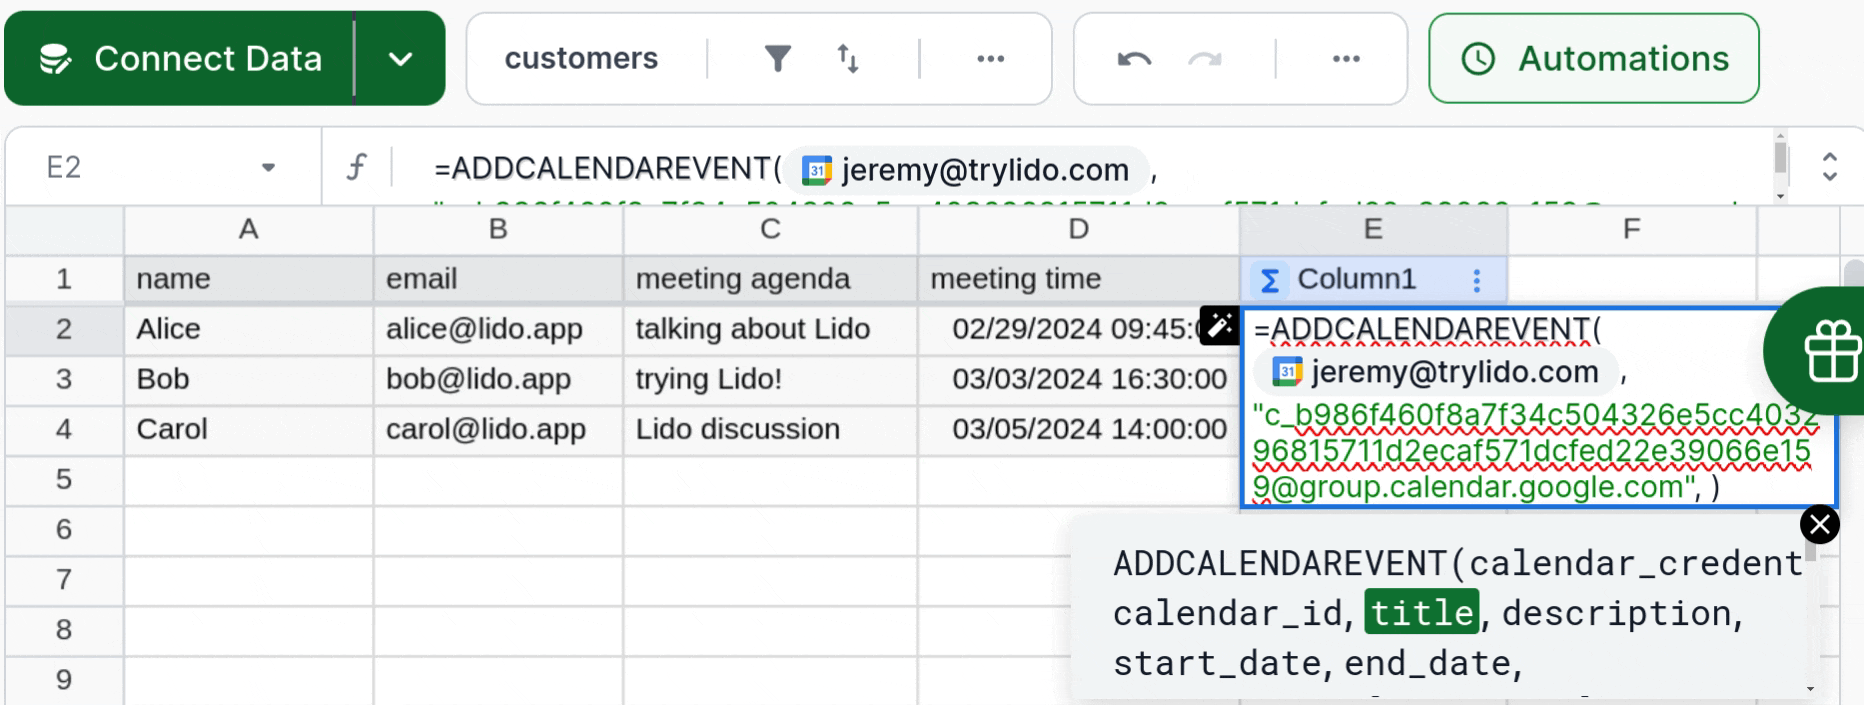
The last required argument is the status_cell. This is where ADDCALENDAREVENT will output a "success" message if it runs successfully, or output error information otherwise. This is going to be a Linked Column to the right of the ADDCALENDAREVENT Computed Column, which we'll set up shortly. For now, just use the cell directly to the right of the one we're editing, which in this case is F2.
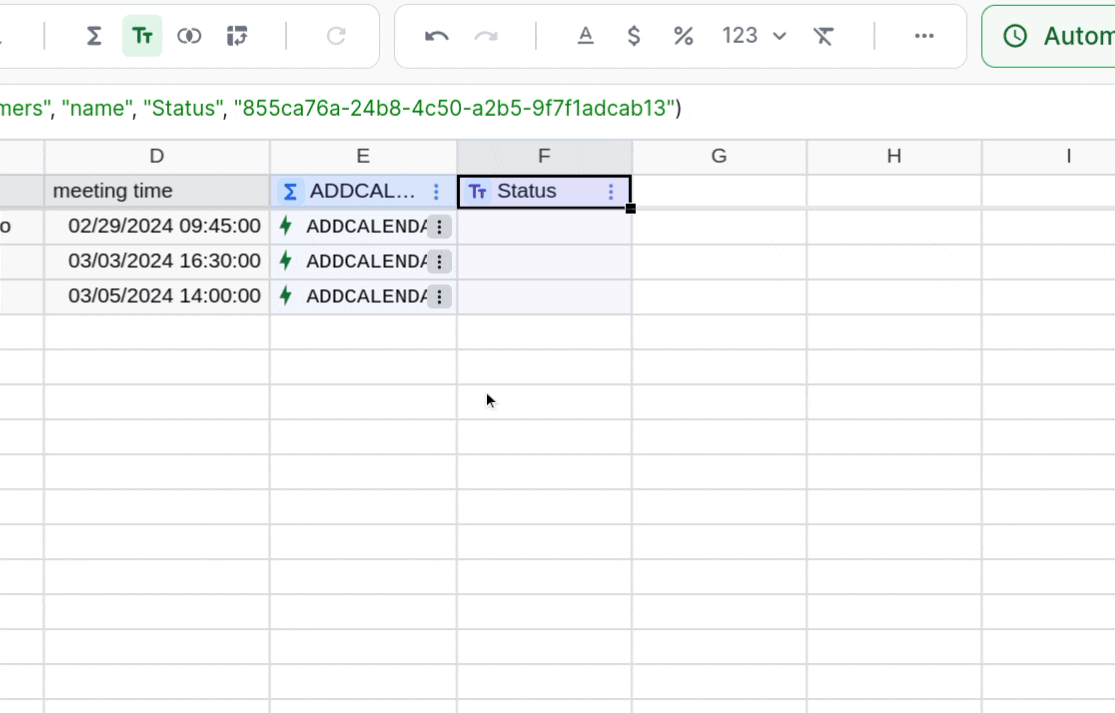
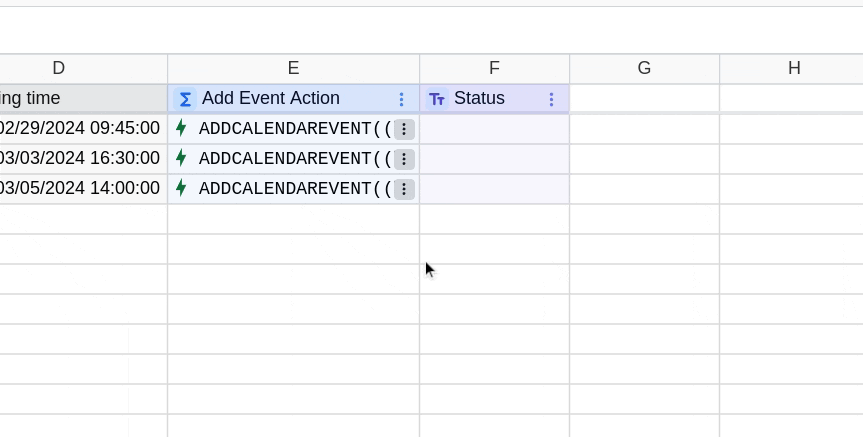
Then hit Enter, and your ADDCALENDAREVENT Computed Column is finished!
To create the Linked Column for the status values, mouse over the right of the customers table, click the Add Column icon, and select "Add linked column". Select a unique ID column to use for the Linked Column and click "Save". The Linked Column will keep track of the status values and make sure they always stay with their associated rows, even if some get re-ordered or removed.
You can also rename the Computed and Linked columns if you'd like. Just edit the header cells and change the name in the window that appears.
Your ADDCALENDAREVENT Action is ready! To try it out, right-click one of the ADDCALENDAREVENT cells and click "Run action". You should see a "success" message appear in the Status column and a new event appear in your Google Calendar. If something went wrong, you'll see an error message appear in the status column instead.
Running once
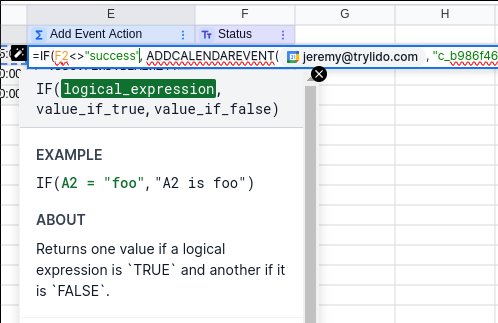
A common use-case for actions like ADDCALENDAREVENT is to create a new event whenever a new row is added to the table, and never run after that. To ensure ADDCALENDAREVENT only runs once, we can wrap it in an IF formula which will check if it has run already. Since ADDCALENDAREVENT outputs success in its status cell when it finishes successfully, we can just check if the status cell does not contain success:
=IF(F2 <> "success", ADDCALENDAREVENT(...))
Now, if we run one of our actions, we can see that it becomes FALSE when it finishes, indicating that it won't run again:
If we ever want to re-enable the action, we can just delete the success message in the Status column.
Adding attendees
We can also optionally invite other people to our event. In our example meeting usecase, we can use this to automatically send them an email about the event (and if we also use Google Meet, they can even join the meeting from the email). Suppose we also want to add our head of sales to every meeting, just in case they want to meet with the customer as well.
All we have to do is add the attendees argument to ADDCALENDAREVENT. We already have the customer emails, and we'll assume that the email for the head of sales is [email protected]. Then for the second argument, we can use the ARRAY function to join the two emails together into a single argument: ARRAY(B2, "[email protected]"). We can add as many attendees as we want by just adding more emails to the ARRAY function.
If you run the ADDCALENDAREVENT Action now, your event will invite the attendees to the event through an email. If their emails are for Google accounts, it will also add the event to their calendars.
Updated 2 months ago